In July I attended the inspiring Distant Stitch Summer School with Jan Beaney and Jean Littlejohn. This proved quite a pivotal weekend for various reasons.
I was very impressed by the standard of the work of the other students, especially in the little "exhibition room" downstairs. My own, supposedly diploma-level work, looked pathetic in comparison. My personal tutorial with Siân only served to reinforce this and it was left that I should reconsider my commitment to the Diploma course.
My initial reaction was to give up but over the summer I realised that I missed the design and stitching, especially after the privilege of sharing the teaching and ideas of Jan and Jean. I tried to get back into the Diploma but it all seemed pointless and in the end things got so bad that I got out my cross stitch sampler to finish it (which I never did!)
However, after speaking again to Siân, it has been agreed that I will transfer to the Certificate course. I had previously done the Certificate over 2 years at a local class but I always felt I was being rushed and would have liked to go into some things more deeply. Also, the Distant Stitch course will be structured in a completely different way and I know that Siân will be a more challenging task master, so I am quite happy. My aim has always been to learn and develop within a structured framework and this appears to be the answer.
My mind is already buzzing with ideas on crosses and stars and I have already taken lots of pictures - all I need now is some of that elusive time to actually do something with them.
Sunday 9 October 2016
Wednesday 18 May 2016
Sidetracked
I have got a bit behind with my Diploma course work but I do have a good excuse - my entry for the CQGB 2016 "On the Edge" Challenge, which I'm pleased to say has been accepted for exhibition!


"Piper on the Edge"
It is intended to show how much of our cultural heritage is at risk and uses a view of the Whitby Abbey ruins and a window from Ely Cathedral (sound familiar?). The background fabrics are my own hand-dyes in a dark and dramatic colour scheme reminiscent (I hope!) of John Piper's wonderful work. It measures 1 m x 60 cm.
Wednesday 3 February 2016
Module 2, Chapter 1
Opus Anglicanum
The subject matter of this chapter could have been tailor-made for me and I realise that I have gone a bit overboard! To be honest, I could have easily produced double this amount but I appreciate that that would have been a bit disproportionate and I need to draw a line and get on.
Most of this work was produced prior to an opportunistic visit to the V&A and that shed a slightly different light on my thoughts. Studying images, however well produced, can never prepare you for the impact of seeing these pieces in real life. All the pieces on display at the V&A, with one exception, were very familiar to me but I was still in awe. The sheer size of the copes and the delicacy and consistency of the stitching would be stunning even with the modern day benefits of daylight lamps, computer aided design etc.
As documented in my study, my visit to the V&A also led to the discovery of a piece which most of the scholars/authors on the subject seem to ignore: the Marnhull Orphrey. The stitching has been verified as being carried out in the early 14th century but the original garment to which it was attached has been lost and it has been used on other items since then. However, to me it was the most beautiful of all the pieces of Opus Anglicanum which I have seen.
Rather stupidly, I decided to present my study in a special notebook which does not fit on a standard A4 scanner. As a result I had to get it scanned in by my husband on an A3 machine. He was unable to adjust the dpi of the scanned in image so I am a little disappointed with the quality but am sure that it will suffice. As my study has been scanned in as a pdf document I am unable to reproduce it here. However, the following is a link to it on my Dropbox account:
file:///Users/wendywingham/Dropbox/copier@livis.co.uk_20160202_182612.pdf
file:///Users/wendywingham/Dropbox/copier@livis.co.uk_20160202_182612.pdf
Looking ahead, my visit to the V&A also gave me some ideas for possible future projects. I have always loved the Mediaeval period and was reminded of two of my favourite items from that period, reliquary boxes and diptychs/triptychs. Indeed one of my most favourite ever pieces is the Wilton Diptych in the National Gallery.


The Wilton Diptych


Reliquary box (Spanish) at the V&A
Tuesday 17 November 2015
Module 1, Loose Ends
As I have now all but finished Module 1, I just need to tie up a few loose ends.
Firstly, in my last feedback, Siân suggested working the following sample again with the stronger yellow colours underneath and the lighter blue greys on top. I have now done this, although it is not identical as I did not have the original sample to hand when I worked it. The two samples are shown side by side below for comparison.

The yellow is so strong that it tends to dominate in both cases, although the second sample (right) is more interesting as the overlaid blue/grey tones are more visible.
I also eventually got round to trying out the Gelliplate I was given for my birthday (Boxing Day last year!). Below are a couple of the prints I produced with it onto paper. The top one uses an old collograph plate with hessian, the lower one uses a commercial stencil of old Roman lettering. After printing, the stark white background was knocked back using dilute Koh-i-Noor. The four A5 pieces at the bottom were printed onto deli paper, a kind of thick tracing paper which I had not tried before.


These are pleasing and were fun to do, but to be perfectly honest I do not think they are that much better than the results which can be achieved with ordinary mono printing.
Now to the record of costings and time spent. I am sure it will come as no surprise that I am not methodical about recording such things! I have no illusions/pretensions about ever selling my work in future and look on the things I buy as the cost of my hobby. I already had everything I have used for this course as a result of doing the C&G Level 2 and Level 3 Certificates so have not actually spent anything specifically for the course. I can, however, list the materials which I have used:
1 x Pink Pig A4 sketchbook
1 x Seawhite A4 sketchbook
Cartridge paper, white and black
Tracing paper
Coloured tissue paper
Khadi paper
Brown wrapping paper
Computer photo paper
Koh-i-Noor dye paints
Brusho
Gouache
Jacquard Lumière fabric paint
Drawing pencils of variousness hardnesses, some water soluble
Watercolour paints and watercolour pencils
Acrylic paint
Acrylic wax
Pastel paper
Commercial letting stencils
Matchsticks, baking foil and string
Letraset metallic felt tips
Pitt artist pens in various widths
Inktense blocks and pencils
Neocolor I and II crayons
Oil pastels
Treasure gold in various colours
PVA glue and Pritt stick
Crafty Notions craft glue
Various acrylic mediums
Craft foam sheets for print blocks and relief work
Softsculpt block
Solvay soluble film
Thermogauze vanishing muslin
Appligue
Heat gun
PFD fabrics from Whaleys, including calico, scrim, pillow cotton, cotton as used/recommended by Jan Beaney and Jean Littlejohn, scolata (my favourite), muslin, linen
Sheer fabrics
Felt
Nappy liners, bondaweb
Procion MX dyes, soda ash, salt, synthrapol
Omega microwave dyes
Household bleach and Jacquard discharge paste
Various hand and machine threads from collection built up over many years
I am again hopeless at recording the time I have spent on the activities in this module. This is partly because I have no intention of ever factoring my time into a selling price and partly because the nature of my life means that I have to snatch odd moments whenever I can. I am doing this course purely for my own enjoyment and development. I know that I spent many, many hours on chapter 2, researching and investigating my topic. I don't think it would be an exaggeration to estimate this at 100 hours. Using a probably conservative average of 5 hours per chapter for the other chapters, this gives a further 50 hours, making an overall figure of about 150 hours, although I suspect in reality that the figure is much higher. This does not include the time spent researching on line, in books and writing this blog or the time spent thinking - of which there was a lot!
As regards storage/health and and safety, I always keep the following in mind:
Wear mask and have damp kitchen towel on surface when measuring out dye powder
Wear gloves when dyeing and discharging, have adequate ventilation when discharging
Keep all dyeing paraphernalia separate from household utensils, mine are kept in the garage
Use an old microwave for dyerect microwave dyes
Use heat gun in well-ventilated area and be careful where it is placed while in use/cooling down
Use a drop cloth for messy activities, also makes good surface for printing on as it is firm but has a little bit of give
Use a separate iron and ironing board for craft work
Materials are stored in a series of units with clear plastic drawers, labelled with contents
Young children very rarely come to the house, but all my things are in a dedicated room upstairs which they cannot get into
As a general comment on my working practices, I have found that I have been much more productive of late as a result of keeping some design things downstairs in my office. This means that I can scribble ideas down as they occur to me and often work for an hour or so before starting my "real" work. I shall try to continue this in the next module as it seems to have helped me.
I don't even want to know how many hours I spend going off on creative tangents online. The following are websites which I visit regularly:
Linda and Laura Kemshall, Design Matters TV www.lindakemshall.com
Pinterest.com
Pinterest is especially dangerous as you can go off for hours from link to link. A quick look at my own main Pinterest site https://www.pinterest.com/emjaytoo2/stuff-id-love-to-make-but-never-will/
is a good reflection of my tastes and, without any intention on my part, clearly illustrates my love of strong colour and geometric shapes!
Facebook groups, such as Workshop on the Web, Distant Stitch Students, Textile Art Collective
I have built up an extensive collection of craft books over the years and dip into these as and when needed. Particular favourites are:
Any of the Kaffe Fassett books, whether knitting or patchwork, as they are just such an uplifting riot of colour and ideas
"Surfaces for Stitch" and "Drawn to Stitch" by Gwen Hedley
Maggie Grey andVal Campbell Harding, "Raising the Surface with Machine Embroidery" and "Layers to Stitch"
Jan Beaney and Jean Littlejohn, Stitch Magic, Creative Embroidery
Jan Messent design series and Celtic, Viking and Anglo-Saxon Embroidery
Claire Benn and Leslie Morgan, Tray Dyeing
To sum up, I have to say that I have thoroughly enjoyed Module 1, even though it took me rather a long time to really get going. Some of the exercises have been more useful than others but I always keep an open mind and am ready to try things. It is often the avenues which you least expect which lead you to the most exciting destinations. I am now really excited about getting stuck into Module 2.
Firstly, in my last feedback, Siân suggested working the following sample again with the stronger yellow colours underneath and the lighter blue greys on top. I have now done this, although it is not identical as I did not have the original sample to hand when I worked it. The two samples are shown side by side below for comparison.


The yellow is so strong that it tends to dominate in both cases, although the second sample (right) is more interesting as the overlaid blue/grey tones are more visible.
I also eventually got round to trying out the Gelliplate I was given for my birthday (Boxing Day last year!). Below are a couple of the prints I produced with it onto paper. The top one uses an old collograph plate with hessian, the lower one uses a commercial stencil of old Roman lettering. After printing, the stark white background was knocked back using dilute Koh-i-Noor. The four A5 pieces at the bottom were printed onto deli paper, a kind of thick tracing paper which I had not tried before.


These are pleasing and were fun to do, but to be perfectly honest I do not think they are that much better than the results which can be achieved with ordinary mono printing.
Now to the record of costings and time spent. I am sure it will come as no surprise that I am not methodical about recording such things! I have no illusions/pretensions about ever selling my work in future and look on the things I buy as the cost of my hobby. I already had everything I have used for this course as a result of doing the C&G Level 2 and Level 3 Certificates so have not actually spent anything specifically for the course. I can, however, list the materials which I have used:
1 x Pink Pig A4 sketchbook
1 x Seawhite A4 sketchbook
Cartridge paper, white and black
Tracing paper
Coloured tissue paper
Khadi paper
Brown wrapping paper
Computer photo paper
Koh-i-Noor dye paints
Brusho
Gouache
Jacquard Lumière fabric paint
Drawing pencils of variousness hardnesses, some water soluble
Watercolour paints and watercolour pencils
Acrylic paint
Acrylic wax
Pastel paper
Commercial letting stencils
Matchsticks, baking foil and string
Letraset metallic felt tips
Pitt artist pens in various widths
Inktense blocks and pencils
Neocolor I and II crayons
Oil pastels
Treasure gold in various colours
PVA glue and Pritt stick
Crafty Notions craft glue
Various acrylic mediums
Craft foam sheets for print blocks and relief work
Softsculpt block
Solvay soluble film
Thermogauze vanishing muslin
Appligue
Heat gun
PFD fabrics from Whaleys, including calico, scrim, pillow cotton, cotton as used/recommended by Jan Beaney and Jean Littlejohn, scolata (my favourite), muslin, linen
Sheer fabrics
Felt
Nappy liners, bondaweb
Procion MX dyes, soda ash, salt, synthrapol
Omega microwave dyes
Household bleach and Jacquard discharge paste
Various hand and machine threads from collection built up over many years
I am again hopeless at recording the time I have spent on the activities in this module. This is partly because I have no intention of ever factoring my time into a selling price and partly because the nature of my life means that I have to snatch odd moments whenever I can. I am doing this course purely for my own enjoyment and development. I know that I spent many, many hours on chapter 2, researching and investigating my topic. I don't think it would be an exaggeration to estimate this at 100 hours. Using a probably conservative average of 5 hours per chapter for the other chapters, this gives a further 50 hours, making an overall figure of about 150 hours, although I suspect in reality that the figure is much higher. This does not include the time spent researching on line, in books and writing this blog or the time spent thinking - of which there was a lot!
As regards storage/health and and safety, I always keep the following in mind:
Wear mask and have damp kitchen towel on surface when measuring out dye powder
Wear gloves when dyeing and discharging, have adequate ventilation when discharging
Keep all dyeing paraphernalia separate from household utensils, mine are kept in the garage
Use an old microwave for dyerect microwave dyes
Use heat gun in well-ventilated area and be careful where it is placed while in use/cooling down
Use a drop cloth for messy activities, also makes good surface for printing on as it is firm but has a little bit of give
Use a separate iron and ironing board for craft work
Materials are stored in a series of units with clear plastic drawers, labelled with contents
Young children very rarely come to the house, but all my things are in a dedicated room upstairs which they cannot get into
As a general comment on my working practices, I have found that I have been much more productive of late as a result of keeping some design things downstairs in my office. This means that I can scribble ideas down as they occur to me and often work for an hour or so before starting my "real" work. I shall try to continue this in the next module as it seems to have helped me.
I don't even want to know how many hours I spend going off on creative tangents online. The following are websites which I visit regularly:
Linda and Laura Kemshall, Design Matters TV www.lindakemshall.com
Pinterest.com
Pinterest is especially dangerous as you can go off for hours from link to link. A quick look at my own main Pinterest site https://www.pinterest.com/emjaytoo2/stuff-id-love-to-make-but-never-will/
is a good reflection of my tastes and, without any intention on my part, clearly illustrates my love of strong colour and geometric shapes!
Facebook groups, such as Workshop on the Web, Distant Stitch Students, Textile Art Collective
I have built up an extensive collection of craft books over the years and dip into these as and when needed. Particular favourites are:
Any of the Kaffe Fassett books, whether knitting or patchwork, as they are just such an uplifting riot of colour and ideas
"Surfaces for Stitch" and "Drawn to Stitch" by Gwen Hedley
Maggie Grey andVal Campbell Harding, "Raising the Surface with Machine Embroidery" and "Layers to Stitch"
Jan Beaney and Jean Littlejohn, Stitch Magic, Creative Embroidery
Jan Messent design series and Celtic, Viking and Anglo-Saxon Embroidery
Claire Benn and Leslie Morgan, Tray Dyeing
To sum up, I have to say that I have thoroughly enjoyed Module 1, even though it took me rather a long time to really get going. Some of the exercises have been more useful than others but I always keep an open mind and am ready to try things. It is often the avenues which you least expect which lead you to the most exciting destinations. I am now really excited about getting stuck into Module 2.
Monday 16 November 2015
Module 1, Chapter 12
I started by collaging two backgrounds from scraps of various fabrics within my chosen colours. The fabrics were mainly hand-dyed muslins with bits of sheers and nets. I attached these to a felt background using bondaweb and free motion embroidered lightly over these in order to hold down the fabric pieces. I then printed over these with Jacquard Lumière fabric paint, using light gold on the dark blue and indigo on the orange/yellow. I especially like the effect of the gold stamped onto the blue, although this was of course lost once the fabric was cut up.


 Arrangement 1 reminds me of one of those wonderful spiky dahlias and could lend itself to making a corsage or fascinator.
 Arrangement 3 shows combinations of two interlocked shapes which again remind me of flowers and would make pleasing broaches.
Arrangement 5 is the same layout placed back to back and I could imaging this as a decoration on a book cover, placed either side of the spine.

I find layout 6 below pleasing and with enough pieces, it could be manipulated and joined to make a ring, perhaps as the outside of a bowl.

 Arrangement 7
 Arrangement 8
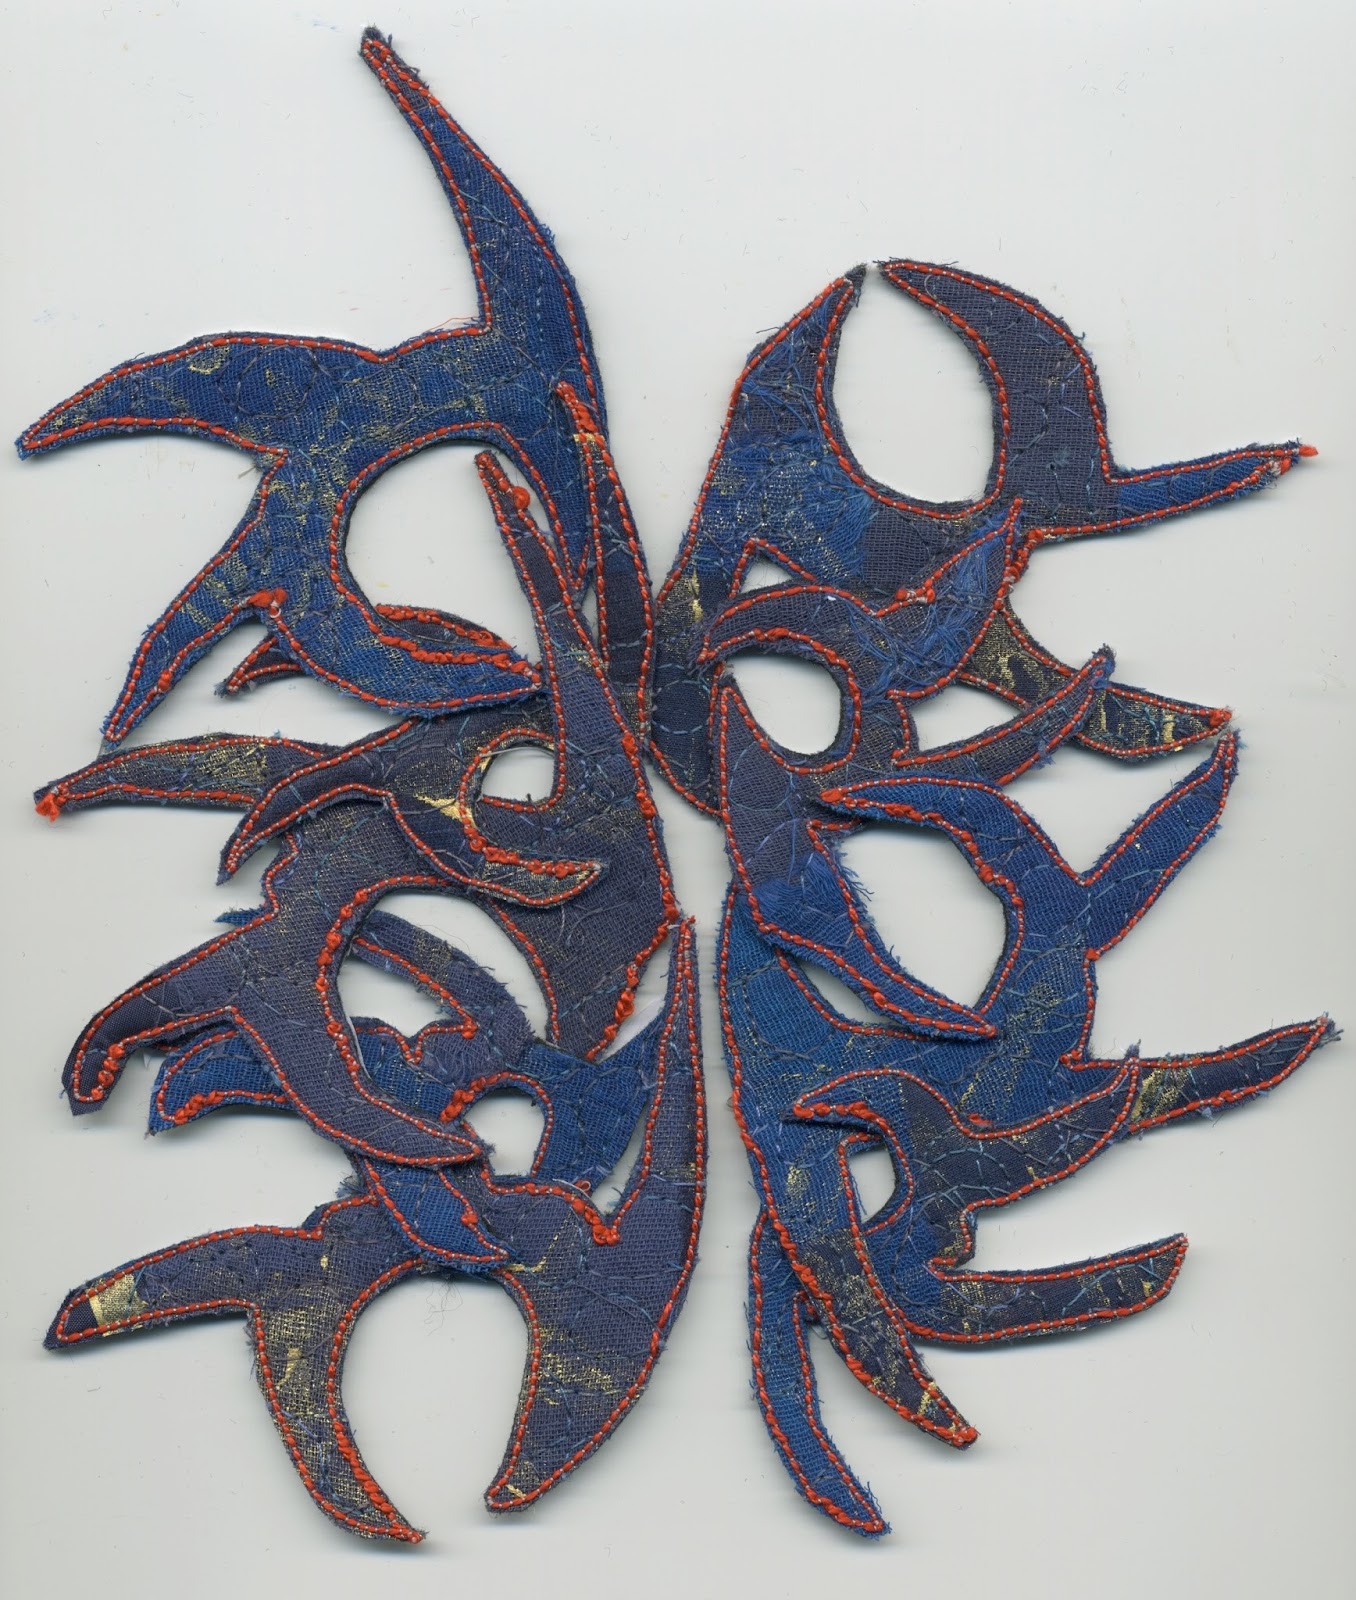
 Combining the shapes led to the following, which I could see as a carnival mask of some kind. Arrangement 9


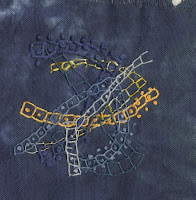
I choose as my shapes for the next stages my dynamic spinning circle shape developed on page 91 and a section of my church tower drawing as highlighted by Siân in the previous feedback. I have since realised that I reversed the image in the process, but for the purposes of the exercise this makes no difference.

I then drew repeated versions of the shapes onto ordinary copy paper and transferred the design to my prepared fabrics by stitching through the paper from the reverse. I used a orangey-red perlé thread in the bobbin on the blue fabric and a blue machine quilting thread on the orange fabric. I then cut out the shapes and started to play.
 Arrangement 1 reminds me of one of those wonderful spiky dahlias and could lend itself to making a corsage or fascinator.
Arrangement 2 could be developed into a necklace or bracelet, if made smaller, or into a colourful band on a cushion. 

 Arrangement 3 shows combinations of two interlocked shapes which again remind me of flowers and would make pleasing broaches.
This arrangement (4) does not prompt any specific item but I have included it as it reminds me of the trefoils in the church windows - how things have come full circle! 

I find layout 6 below pleasing and with enough pieces, it could be manipulated and joined to make a ring, perhaps as the outside of a bowl.

I found the rhomboid-ish yellow shape rather dull and uninteresting by comparison
 Arrangement 7
although I did quite like these rather quirky star shapes.
 Arrangement 8
 Combining the shapes led to the following, which I could see as a carnival mask of some kind. Arrangement 9
Of all the above designs, I think 1, 2, 3 or 6 could be developed further. No. 6 in particular could look very effective worked in metallic threads.
Sunday 8 November 2015
Module 1, Chapter 13
Wendy Dolan
Few
textile artists appear to have concentrated specifically on church
architecture, but many have produced work inspired by it and for my first
textile artist I shall look at the work of Wendy Dolan.
Wendy
is obviously a skilled artist and her architectural pieces rely heavily on

A window in a Brighton church (from book)

A doorway at Kilpeck Church in Herefordshire (from book)
According to her recently published book “Layer, Paint and Stitch”
(Search Press, 2015), she first creates a textured background, then colours it
and then transfers her drawing by sewing over it through the paper from the
reverse. This is then further stitched and embellished from the front,
depending on the effect she wishes to achieve. Many of the pieces remind me of
John Piper’s work, inasmuch as she takes a section of a building or particular
feature and sets it on a randomly coloured background. However Wendy’s pieces do not have the same
dark, brooding quality as Piper’s. I find Wendy’s techniques interesting and
should like to explore
them at some point.
Wendy's website is wendydolan.co.uk
Yvonne Brown
My
second textile artist is Yvonne Brown. She is perhaps more of a quilter than an
embroiderer but I especially like her work as much of it is inspired by Ely
Cathedral, which is somewhere I know and from where many of my own designs are
taken. In her only book Tex-Tiles and other Treasures (Woods End Studio), she
develops a technique for making aged fabric tiles based on some of those at
Ely. Yvonne’s method is to transfer her design onto a fabric sandwich made from
synthetic felt, stabiliser and a background fabric. The design is then stitched
and the excess felt around the edges burned away with a soldering iron. A heat
gun is then used to distress the tile further.
I
tried this technique myself some years ago but it was not overly successful, I
think largely due to my kunin felt, which would just not melt as it was
supposed to. As a result I had to cut away the excess felt and dispense with
the additional distressing of the pattern. The end result was far too perfect .
However, I hope to revisit this technique again using a different brand of
felt!
The following examples of Yvonne's work are all taken from her book:
 Medieval Pavement
 Medieval Tiles
 Stone Story I
Yvonne's work especially appeals to me because she combines both quilting and textile/embroidery techniques. I could envisage using a similar method to produce a background which could then be further embellished with hand stitching and beads.
Yvonne's website is yvonnebrown.co.uk, although sadly it is not very up to date.
Subscribe to:
Posts (Atom)